It's very easy to build a geiger counter from various parts.
A Geiger counter consists of a power supply, a tube containing a gas that ionizes when a particle passes through it and a speakeror even a galvanometer.
The first thing to do is to buy a Geiger tube. Do not try to make one.
The main difficulty is that we must supply it with "high voltage".
To resolve this problem, I bought EL-Wire.
http://en.wikipedia.org/wiki/Electroluminescent_wire
Electroluminescent wire (often abbreviated to EL wire) is a thin copper wire coated in a phosphor which glows when an alternating current is applied to it.

The first step!
On ebay, we can find a EL-wire for under 10€, and it works with two batteries of 1.5 V = 3V!
With 3V EL-Wire power supply, we are left with 125Vac 1kHz output (remove EL-Wire).
There remains to add a Dickson multiplier (parallel capacitor voltage multiplier)
With the tube that I bought, I need 700V (it's a 6107/bs212 tube).
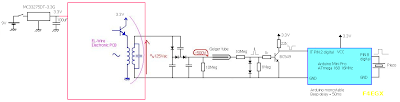
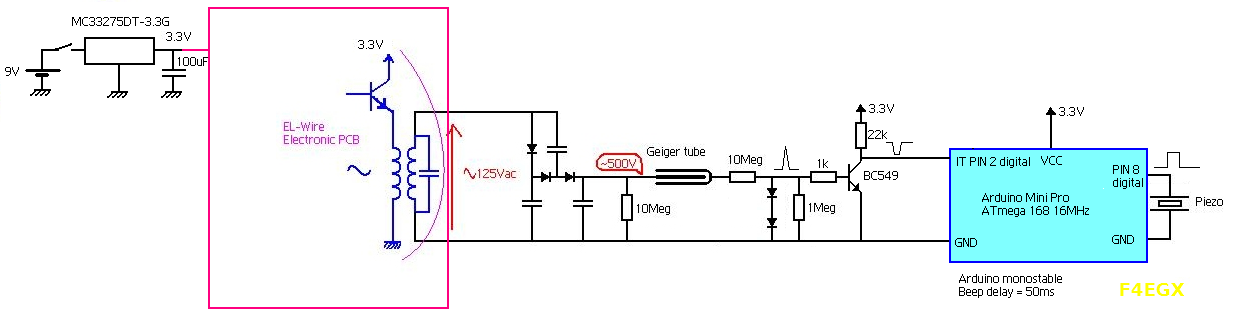
The diagram below is enough and easy to build. (Blue: EL-Wire power supply, black: Dickson multiplier)


Dickson multiplier:
3x capacitor = 4.7nF 4kV
3x Diode = 1N4007
Direct test with piezo speaker!

I was advised on my tube, the power to 500V. So I added a 10Meg resistor to load the output of my power supply. I am now below the 650V.
To test my geiger tube, I first started looking at the pulses with an oscilloscope to the legs of the resistance of 10M connected to the case of Geiger tube.
Then I connected a Piezo speaker with resistor 1k.
We hear many clicks! ;) About 5 clicks per minute! The background noise!
It's not a good idea to connect a piezo speaker direct to 10Meg that prematurely ages the tube.
Add an Arduino!
I remove le piezo speaker and add piezo buzzer and arduino mini pro ATmega168 16MHz.
Now the arduino is programmed as a monostable.
Each ionization, a 50ms beep is emitted.

 ------------------------------------------------------------------------
/*gm code Arduino beep */
//pins
const int GM=3; // IN
const int beep=8; // out buzzer
Direct test with piezo speaker!

I was advised on my tube, the power to 500V. So I added a 10Meg resistor to load the output of my power supply. I am now below the 650V.
To test my geiger tube, I first started looking at the pulses with an oscilloscope to the legs of the resistance of 10M connected to the case of Geiger tube.
Then I connected a Piezo speaker with resistor 1k.
We hear many clicks! ;) About 5 clicks per minute! The background noise!
It's not a good idea to connect a piezo speaker direct to 10Meg that prematurely ages the tube.
Add an Arduino!
I remove le piezo speaker and add piezo buzzer and arduino mini pro ATmega168 16MHz.
Now the arduino is programmed as a monostable.
Each ionization, a 50ms beep is emitted.

/*gm code Arduino beep */
//pins
const int GM=3; // IN
const int beep=8; // out buzzer
//variable
long countGM = 0;
void setup() {
pinMode (GM, INPUT);
pinMode (beep, OUTPUT); // Buzzer
// demarrage des interruptions
attachInterrupt(0, GMcount, FALLING); // IT sur PIN2
digitalWrite(beep, 0);
}//fin setup
void loop() {
if (countGM !=0)
{
digitalWrite(beep,1);
countGM=0;
delay(50);
digitalWrite(beep,0);
}
}// fin loop
// interruption
void GMcount()
{ countGM=1;}
To be continued... and thank you Google translate ;)
F4EGX - 5 october 2011
long countGM = 0;
void setup() {
pinMode (GM, INPUT);
pinMode (beep, OUTPUT); // Buzzer
// demarrage des interruptions
attachInterrupt(0, GMcount, FALLING); // IT sur PIN2
digitalWrite(beep, 0);
}//fin setup
void loop() {
if (countGM !=0)
{
digitalWrite(beep,1);
countGM=0;
delay(50);
digitalWrite(beep,0);
}
}// fin loop
// interruption
void GMcount()
{ countGM=1;}
------------------------------------------------------------------------
To be continued... and thank you Google translate ;)
F4EGX - 5 october 2011
Bonjour,
RépondreSupprimerPourriez vous indiquer le modèle de tube utilisé?
Merci d'avance
dans mon cas c'est un 6107/bs212 pour Victoreen-anton.
RépondreSupprimerIl faut choisir le tube en fonction de ce qu'on veut mesurer (alpha, beta, gamma) et limiter la tension pour rester sur le plateau de tension du tube indiqué dans la datasheet.